Introduction
Keeping your car looking brand new is more than just a vanity project—it preserves its value, protects the paint, and extends its life. Professional detailing services can cost anywhere from $100 to $300 per session [source], but what if you could achieve that showroom-perfect shine right in your driveway?
Welcome to the ultimate DIY car washing guide, packed with seven secret hacks that pros don’t often share. These tips will help you remove grime, shield your paint, and rejuvenate every inch of your vehicle—without breaking the bank or consuming your entire weekend.
Let’s dive into the secrets of making your car sparkle like it just rolled off the showroom floor.
Key Takeaways Table
| Aspect | Key Insight |
|---|---|
| Cost Savings | DIY car washing can save up to $150 per wash compared to professional services. |
| Time Efficiency | With smart hacks, you can achieve a full detail in under 90 minutes. |
| Paint Protection | Correct techniques prevent scratches, swirls, and clear coat damage. |
| Eco-Friendliness | Using pH-neutral soaps and water-saving methods helps reduce environmental impact. |
| Secret Hacks Revealed | 7 professional-level techniques adapted for easy home use. |
1: Preparing for the Perfect DIY Car Wash
Proper preparation is the backbone of an effective DIY car wash. Without it, even the best techniques will fail to deliver that mirror-like finish.
1.1: Essential Tools and Products You’ll Need
Before you start, gather these essentials:
-
Two 5-gallon buckets (one for soap, one for rinse)
-
High-quality microfiber mitts (not sponges)
-
pH-balanced car wash soap (like Meguiar’s Gold Class)
-
A foam cannon or garden hose sprayer
-
Clay bar kit for paint decontamination
-
Microfiber drying towels
-
Carnauba wax or ceramic sealant
-
Tire and trim dressing
Avoid using dish soap or household cleaners—they strip protective coatings from your car’s paint [source].
1.2: Choosing the Right Location
The best spot for car washing is:
-
Shaded and cool: Direct sun causes premature drying and water spots.
-
Flat with good drainage: Prevents puddling under the car.
-
Away from trees: To avoid sap or falling debris.
1.3: Safety Precautions Before You Begin
-
Cover delicate parts like sensors and electrical connections.
-
Use gloves when handling chemicals.
-
Avoid washing immediately after driving—let the engine and brakes cool to prevent water damage.
2: The Two-Bucket Wash Method — A Game Changer
The two-bucket method isn’t just a fancy idea—it’s a proven technique that reduces paint scratching and swirling by 80% [source].
2.1: Why the Two-Bucket Method Works Wonders
This technique uses:
-
One bucket for clean, soapy water.
-
One for rinsing your mitt after each pass.
By separating dirty water, you prevent grit from scratching the paint.
2.2: Step-by-Step Two-Bucket Technique
-
Rinse the car fully to loosen dirt.
-
Dip your mitt in the soapy bucket, wash a panel gently.
-
Rinse the mitt in the clean-water bucket.
-
Repeat for every section.
-
Always start from the roof down to the tires to avoid dragging grime upward.
2.3: Mistakes to Avoid During Bucket Washing
-
Never reuse rinse water for soaping.
-
Don’t scrub too hard—let the mitt glide.
-
Rinse buckets frequently for large cars.
3: Hack #1 — Use a Foam Cannon for Deep Dirt Removal
Foam cannons break down stubborn dirt before you even touch the car, preventing most scratches from the start.
3.1: Benefits of Foam Pre-Wash
-
Encapsulates dirt particles, allowing them to slide off safely.
-
Minimizes the need for hard scrubbing.
-
Prepares the paint for a swirl-free manual wash.
3.2: How to Properly Use a Foam Cannon
-
Fill cannon bottle with pH-neutral soap and warm water.
-
Attach to a pressure washer or garden hose.
-
Spray the entire car in thick foam.
-
Let it sit for 5 minutes—but do not let it dry.
-
Rinse off thoroughly.
Pro Tip: Use a foam cannon with a PSI range of 1000–2000 for optimal results [source].
3.3: Best Foam Cannon Options for DIYers
-
Budget: Twinkle Star Foam Cannon ($20–30)
-
Mid-range: Chemical Guys Torq ($60)
-
Pro-level: MTM Hydro PF22 ($100+)
4: Hack #2 — Apply the “Clay Bar” Technique for Paint Decontamination
Clay bars are the industry’s secret weapon for removing invisible contaminants that soap can’t touch.
4.1: What is a Clay Bar and Why It Matters
Clay bars lift:
-
Rail dust
-
Industrial fallout
-
Brake dust particles
This leaves the paint silky smooth, essential for wax adhesion.
4.2: Step-by-Step Clay Bar Application
-
Wash and dry the car.
-
Spray a clay lubricant onto a 2×2 foot section.
-
Gently rub the clay bar over the surface using linear strokes.
-
Wipe clean with a microfiber towel.
-
Repeat until entire car is smooth.
Test by sliding your fingers across the paint—if it feels rough, more claying is needed.
4.3: Common Clay Bar Mistakes
-
Skipping lubrication will scratch the paint.
-
Using excessive pressure can mar clear coat.
-
Reusing old clay can cause contamination.
5: Hack #3 — Use Microfiber Madness for a Scratch-Free Finish
Microfiber is superior to traditional towels or chamois because it traps dirt within its fibers, away from the paint surface.
5.1: The Superiority of Microfiber Cloths
-
Holds up to 7 times its weight in water.
-
Reduces friction on paint.
-
Leaves no lint or streaks.
Use waffle weave microfiber towels for drying large panels.
5.2: Proper Microfiber Washing and Maintenance
-
Wash separately from other fabrics.
-
Use no fabric softener—it clogs fibers.
-
Dry on low heat or air dry to preserve softness.
5.3: Drying Techniques for Streak-Free Shine
-
Blot, don’t wipe to avoid dragging dirt.
-
Dry from the roof down.
-
Use a drying aid spray for added lubrication and gloss.
6: Hack #4 — Seal and Protect with Quality Wax or Sealant
Waxing seals your hard work, protecting paint from UV rays, rain, and pollution.
6.1: Difference Between Wax and Sealant
| Feature | Wax | Sealant |
|---|---|---|
| Natural or synthetic | Natural (Carnauba) | Synthetic polymers |
| Durability | 2–3 months | Up to 12 months |
| Finish | Warm, deep glow | Glassy, slick shine |
6.2: Step-by-Step Application Guide
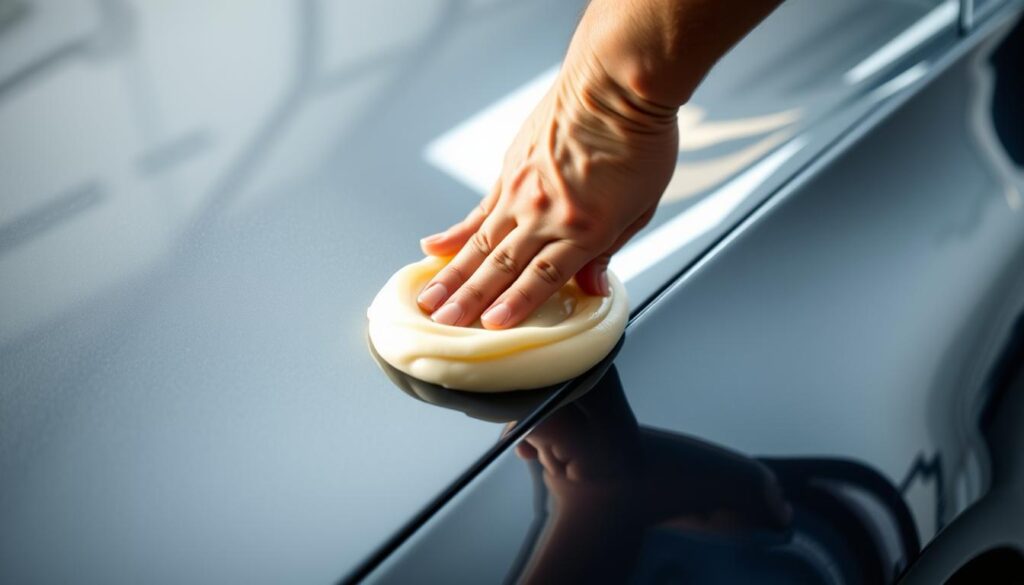
-
Apply a thin layer of wax/sealant using a foam applicator.
-
Let it haze (10–15 minutes).
-
Buff gently with a clean microfiber cloth.
Machine buffers save time for larger vehicles but require careful use to avoid burns.
6.3: Recommended Products for Lasting Protection
-
Meguiar’s Ultimate Liquid Wax
-
Chemical Guys JetSeal Sealant
-
Turtle Wax Hybrid Solutions Ceramic Spray
7: Hack #5 — The Secret of Tire and Trim Restoration
Shiny paint won’t matter if tires and trims look dull and faded. Restoring these gives the entire vehicle a crisp, new appearance.
7.1: Reviving Faded Plastic Trims
-
Use products like CarGuys Plastic Restorer.
-
Apply with a foam pad and buff to shine.
-
Protects against UV fading for months.
7.2: Tire Cleaning and Dressing Tips
-
Scrub tires with a dedicated tire brush.
-
Apply water-based tire dressing for a natural look (solvent-based can crack rubber over time).
-
Let dressing cure for 30 minutes before driving.
7.3: Maintaining the Restored Look Over Time
-
Clean tires and trims once a month.
-
Reapply dressing after heavy rain or snow exposure.
Conclusion
Achieving a showroom-perfect shine at home isn’t magic—it’s a combination of the right tools, tested techniques, and a touch of patience. With these seven secret DIY hacks, even a first-timer can elevate their car’s appearance to rival professional detailing services.
Let’s briefly recap the gold-standard steps:
-
Preparation is King: Gather the right gear, pick the perfect washing spot, and handle your vehicle’s surfaces safely.
-
Two-Bucket Wash Method: The age-old pro trick to keep contaminants off your car’s delicate paint.
-
Foam Cannon Pre-Wash: A foamy barrier against scratching, removing dirt before you lay a mitt on the bodywork.
-
Clay Bar Technique: The hidden detail that many skip—but shouldn’t—if you want flawless, smooth paint ready for wax.
-
Microfiber Drying Magic: Proper drying prevents streaks and swirls, ensuring the final gloss you see reflects quality effort.
-
Wax & Sealant Armor: Protective coatings that keep your labor locked in for months against UV, water, and grime.
-
Tire & Trim Restoration: Those black plastics and rubbers frame your shiny paint—don’t neglect them if you want that fresh-off-the-lot vibe.
Each step builds on the last, crafting not just temporary sparkle but lasting protection and vehicle pride.
Why Bother Doing This Yourself?
-
Cost Savings: Every at-home wash could save you $50–$150 compared to a professional detailing shop [source].
-
Control Over Products: You choose pH-balanced soaps, gentle microfiber, and eco-friendly wax—not harsh industrial chemicals.
-
Satisfaction: There’s joy in seeing your own hands transform a dusty, tired-looking car into a glistening beauty.
Plus, as research shows, clean cars retain value better—a simple wax coat alone can boost paint life by years [source].
Additional Expert Tips for Next-Level DIY Car Washing
If you want to go beyond “good” into the realm of “car show ready”, here are some professional secrets:
1. Use a Grit Guard Insert in Buckets
This simple grid sits at the bottom of your bucket and traps dirt below your mitt’s reach. Costing less than $15, it greatly reduces the risk of paint swirls.
2. Try a Leaf Blower for Drying
A clean, filtered leaf blower can safely dry water off panels and tight spaces like mirrors and grills, leaving zero towel marks.
3. Don’t Forget Door Jambs and Undercarriage
Even premium washes skip these. Open the doors and gently wipe jambs to prevent rust buildup. Use a hose to rinse under the wheel wells.
4. Glass Perfection Matters
Dirty windows ruin the overall finish. Use an ammonia-free glass cleaner and two microfibers—one for wiping, one for buffing—for streakless clarity inside and out.
Common DIY Car Washing Mistakes to Avoid
Avoiding these blunders keeps your finish flawless:
-
Washing in Direct Sun: Causes water spots and premature drying.
-
Using Dish Soap: Strips protective wax and dries out rubber seals.
-
Reusing Old Towels: Worn towels embed dirt particles that scratch paint.
-
Skipping Clay Bar After Winter: Road salt and sand embed into paint—clay removal is essential after snowy seasons.
Remember: It’s not about washing harder—it’s about washing smarter.
Eco-Friendly DIY Car Washing: How to Conserve Water
-
Foam cannons use far less water than open-hose rinsing.
-
Use no-rinse car wash solutions for winter or apartment living.
-
Capture rinse water with driveway mats to prevent chemical runoff into drains [source].
This keeps your car and the planet clean.
Final Thoughts: The Power of Regular Care
Washing your car shouldn’t be seen as a chore—it’s a small investment that yields huge returns:
-
Higher resale value
-
Extended paint life
-
Better fuel efficiency (a clean car has less aerodynamic drag—really!)
Just an hour every few weeks ensures your vehicle remains a head-turner, saving you money and headaches later..
FAQs About DIY Car Washing
1. Is DIY car washing better than professional detailing?
Yes. DIY car washing saves money, allows full control over products used, and can deliver professional results when done properly.
2. How often should I wash my car at home?
For optimal protection, wash your car every two weeks, or weekly if exposed to road salt, mud, or heavy pollution.
3. Do I need a foam cannon for DIY car washing?
Not mandatory, but highly recommended. A foam cannon helps reduce scratches by pre-lifting dirt from the paint surface.
4. What is the purpose of the two-bucket method?
It separates clean soap water from dirty rinse water to prevent paint scratches and swirls.
5. Can I use dish soap to wash my car?
No. Dish soap strips wax and damages your car’s protective coatings. Always use pH-neutral car wash soap.
6. How do I know if my car needs claying?
If the paint feels rough after washing, use a clay bar to remove embedded contaminants for a smooth finish.
7. Is waxing or sealing necessary after washing?
Yes. Wax or sealant protects paint, enhances shine, and guards against UV rays, acid rain, and pollutants.


