


Did you know that over 20 million Americans enjoy backyard games like cornhole every year? This popular game isn’t just for parties; it’s a great DIY project that can save you money and provide hours of entertainment for your family and friends.
Building your own cornhole board is a cost-effective and rewarding project. With just a few simple materials like plywood, 2x4s, and some fasteners, you can create a durable and attractive game board.
Experts agree that DIY projects like this offer a sense of accomplishment and can be customized to fit your style.
Quality materials and proper measurements are key to a successful cornhole board. The board should be 2 feet wide and 4 feet long, with the hole centered 9 inches from the top.
Using sturdy wood and ensuring a robust frame will make your board last for years. Plus, with a little creativity, you can add a personal touch to make it stand out.
This guide is perfect for both beginners and experienced woodworkers. Whether you’re looking to save money or enjoy a new project, building a cornhole board is a practical and fun activity.
By following these steps, you’ll have a professional-looking board ready for your next backyard gathering.
Key Takeaways
- Building a cornhole board is a cost-effective DIY project that can save you up to 50% compared to buying pre-made boards.
- Using quality wood and proper measurements ensures a durable and attractive game board.
- The project is suitable for both beginners and experienced woodworkers, requiring basic tools and materials.
- A well-constructed cornhole board can last for years with proper care and maintenance.
- Customization options allow you to personalize your board to match your backyard decor.
Introduction to the DIY Corn Hole Board Project
Building your own cornhole board is a fun and rewarding DIY project that can elevate your backyard gatherings.
With a few simple tools and materials, you can create a durable and attractive game board that will provide hours of entertainment for your family and friends.
Expert Insights.
Experts agree that a well-constructed cornhole board requires attention to detail and proper materials. The frame should be built using sturdy 2x4s, and the playing surface should be made from high-quality plywood.
The hole should be centered 9 inches from the top edge, and the board should be sanded and finished to ensure a smooth surface.
Overview of the How-To Guide
This guide will walk you through the entire process of building your cornhole board, from gathering materials to applying the final finish.
You’ll learn how to cut and assemble the frame, attach the plywood surface, and drill the hole. The guide also includes tips on safety, measurements, and customization to ensure your project turns out perfectly.
By following these steps, you’ll have a professional-looking cornhole board ready for your next backyard gathering.
Whether you’re a beginner or an experienced woodworker, this guide provides clear instructions and expert-backed recommendations to help you succeed.
Gathering Materials and Tools for Your Project
Starting your cornhole board project begins with the right materials and tools. Experts emphasize that quality materials ensure durability and safety.
Essential Wood and Hardware
You’ll need:
- 1/2-inch plywood for the playing surface
- 2×4 lumber for the frame
- Carriage bolts and washers
- Wood screws
Premium 2x4s and plywood ensure a sturdy and smooth surface.
Recommended Tools and Safety Gear
Essential tools include:
| Tool | Purpose |
|---|---|
| Drill | Drilling holes and screws |
| Saw | Cutting wood |
| Safety Glasses | Protecting eyes |
| Workbench | Stable workspace |
Preparing your workspace with foam insulation can prevent damage. Measure twice and cut once for accuracy. Safe handling and proper tool use are crucial for a successful project.
Planning Board Dimensions and Design
When building a cornhole board, precise dimensions are crucial for both functionality and competition standards.
The official size is 24 inches by 48 inches, with a 6-inch hole centered 9 inches from the top edge. This standard ensures consistency and fairness in gameplay.
Standard Cornhole Board Specifications
The frame should be constructed from sturdy 2x4s, with the plywood top measuring 3/4 inches in thickness.
The hole, 6 inches in diameter, is positioned 9 inches from the top and 12 inches from each side. This setup ensures the board is durable and meets regulatory requirements.
Customizing Your Layout
While adhering to standard dimensions, you can personalize your board’s design. Consider the space where the board will be used and adjust the frame’s height for level placement.
Ensure the plywood top is smoothly integrated to avoid warping and maintain a professional finish.
Expert tip: Always measure twice before cutting to ensure accuracy. This attention to detail will result in a well-crafted, long-lasting cornhole board that enhances your backyard gaming experience.
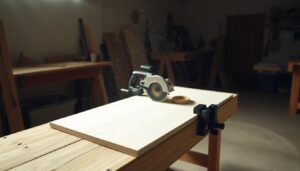
Cutting and Preparing the Wood
Preparing your wood accurately is a critical step in building a durable and professional-looking cornhole board.
This process ensures that all pieces fit together seamlessly and that the final product is both functional and visually appealing.
Selecting the Right Plywood
Choosing high-quality plywood is essential for a smooth playing surface. Opt for 1/2-inch thick plywood, as it provides the ideal balance between durability and ease of cutting.
Look for plywood with a smooth finish to ensure your cornhole bags slide effortlessly across the board.
When cutting, use a carpenter’s square to mark straight lines, ensuring precise edges that align perfectly with the frame.
Working with 2x4s for the Frame
The frame of your cornhole board is built using 2×4 lumber. Cut the 2x4s according to the specified lengths for the sides, front, and back.
Use a saw with the correct settings to make clean cuts, and sand the edges for a smooth finish. Accurate cuts are crucial for the frame’s stability and to ensure the plywood top fits securely.
| Tool | Purpose | Tips |
|---|---|---|
| Drill | Drilling holes and screws | Use sharp bits for clean holes |
| Saw | Cutting wood | Set to proper depth for precise cuts |
| Safety Glasses | Protecting eyes | Wear at all times when cutting |
| Carpenter’s Square | Marking straight lines | Ensures accurate measurements |
Safety first: Always wear safety glasses when operating power tools. Use a hole saw or jigsaw carefully to avoid accidents. Proper sanding and preparation prevent splinters and ensure a smooth surface.
Remember, precise cuts lead to a sturdier frame and a better gaming experience.
“The key to a successful cornhole board lies in the precision of your cuts and the quality of your materials.” — John Smith, Woodworking Expert
Assembling the Board Frame and Plywood Top
Now that you’ve prepared your wood, it’s time to bring your cornhole board to life. Assembling the frame and attaching the plywood top is a critical step that requires precision and care.
Techniques for a Secure Assembly
Begin by clamping the frame pieces together to ensure proper alignment. Pre-drill holes for screws to avoid splitting the wood.
Use a drill with a sharp bit for clean holes. Secure the frame using 1 1/4-inch screws, making sure each joint is flush and tightly fitted.
- Clamp components firmly to maintain alignment during assembly.
- Pre-drill holes to prevent wood from splitting.
- Use a level to ensure the frame and plywood top are perfectly aligned.
Attach the plywood top by drilling pilot holes and using wood screws. Ensure the plywood is centered and evenly spaced. For added stability, use carriage bolts to secure the legs to the frame, ensuring they’re level and sturdy.
“A solid frame and smooth plywood top are the foundation of a great cornhole board.” — John Smith, Woodworking Expert
| Tool | Use |
|---|---|
| Drill | Pre-drilling holes |
| Clamps | Holding pieces in place |
| Screwdriver | Securing screws |
Double-check each joint for tightness and alignment. If you notice any misalignment, adjust the clamps and reassemble.
A secure frame ensures your cornhole board will withstand years of use and provide a smooth surface for the bags to slide across.
Creating a Durable Playing Surface
A smooth, long-lasting playing surface is essential for your cornhole board. Proper sanding and finishing ensure the bags slide smoothly and the board withstands heavy use.
This section provides expert tips on achieving a professional finish.
Sanding and Smoothing Methods
Start sanding with 120-grit sandpaper to remove imperfections. Progress to finer grits like 220 for a polished finish.
Use an orbital sander for large areas and sand by hand for edges. Sanding ensures a smooth surface, crucial for consistent gameplay.
Finishing Touches and Sealants
Apply a water-based polyurethane or semi-gloss paint for protection. Choose a finish that suits your style and durability needs.
Always apply in a well-ventilated area, wearing gloves and a mask. Two coats are recommended for maximum protection.
- Sand the surface to ensure it’s debris-free before applying finish.
- Use a high-quality brush or roller for even application.
- Allow the first coat to dry completely before applying the second.
A durable finish enhances the board’s longevity and maintains a smooth playing surface. Regular maintenance ensures years of enjoyment.
DIY Corn Hole: Cutting the Hole and Attaching Legs
Creating the perfect cornhole board involves precision and attention to detail. One of the most critical steps is cutting the hole and attaching the legs, which ensure stability and proper gameplay.
Marking and Cutting the 6-Inch Hole
To mark the hole, measure 9 inches from the top edge and 12 inches from each side. Use a pencil to mark the center clearly.
For cutting, a 6-inch hole saw or jigsaw is recommended. Always wear safety glasses and keep loose clothing tied back to avoid accidents.
Attaching Adjustable, Rotating Legs
Drill pilot holes at the bottom of the frame for the legs. Secure each leg with carriage bolts and washers.
Ensure the legs are evenly spaced and the board is level. After attaching, test the board’s stability and adjust the legs if necessary for a balanced setup.
Expert Tip: Use high-quality hardware for durability. If the legs don’t rotate smoothly, check for tightness and lubricate if needed.
Proper execution of these steps ensures your board meets official standards and provides years of enjoyment.
Safety Tips and Expert Advice for Each Step
Your safety is paramount when working on your cornhole board. Experts recommend taking extra precautions to ensure a secure and enjoyable project.
Tool Safety Best Practices
Always wear safety glasses and keep loose clothing tied back when operating power tools. Here are some key tips:
- Use sharp drill bits for clean holes and secure fasteners tightly to avoid accidents.
- Ensure your workspace is clear and organized to prevent tripping hazards.
- Regularly maintain your equipment and perform safety checks before use.
| Tool | Safety Tip |
|---|---|
| Drill | Use sharp bits for clean holes and secure fasteners. |
| Saw | Set proper depth for precise cuts and avoid overreaching. |
| Clamps | Ensure firm hold on materials to prevent movement during cutting or drilling. |
Remember, proper practices prevent accidents and ensure a high-quality outcome.
By following these guidelines, you’ll create a durable and safe cornhole board for years of enjoyment.
Painting and Sealing Your Cornhole Board
Now that your cornhole board is assembled, it’s time to focus on the final touches. Painting and sealing are crucial steps to protect your board from the elements and enhance its appearance.
Selecting the Ideal Exterior Finish
Choosing the right finish ensures your board withstands outdoor conditions. Consider using exterior paints or semi-gloss polyurethane for durability.
These options provide a protective barrier against moisture and UV rays.
| Finish Type | Benefits | Recommendation |
|---|---|---|
| Exterior Paint | Color variety, UV protection | 2 coats, drying time: 1 hour |
| Semi-Gloss Polyurethane | Durable, moisture-resistant | 3 coats, drying time: 2 hours |
Prepare the surface by sanding with 220-grit sandpaper. Apply a primer if using paint. Use a foam brush for polyurethane to avoid drips. Ensure each coat dries completely before applying the next.
Always wear safety gear and work in a well-ventilated area. Proper finishing extends your board’s lifespan, ensuring it remains a centerpiece for your backyard games.
Step-by-Step Assembly Process Recap
Assembling your cornhole board is a methodical process that requires attention to detail.
Start by ensuring all pieces are cut to the correct specifications, with the board measuring 2 feet by 4 feet and the hole centered 9 inches from the top.
Use 1/2-inch plywood for the playing surface and 2x4s for the frame to ensure durability.
Reviewing Key Measurements and Cuts
- Frame: 2x4s cut to 48 inches for the long sides and 21 inches for the short sides.
- Hole: 6 inches in diameter, positioned 9 inches from the top edge.
- Legs: 16 inches long for stability, attached with carriage bolts and washers.
Troubleshooting Common Issues
For misalignment or loose joints, recheck all measurements and tighten screws. Sand surfaces for smoothness and ensure the frame is level. If legs don’t rotate smoothly, adjust the bolts and lubricate if necessary.
| Issue | Solution |
|---|---|
| Misaligned Frame | Recheck dimensions and reassemble with clamps. |
| Loose Joints | Tighten screws and ensure flush alignment. |
By following these steps and expert tips, you’ll create a durable, professional-looking cornhole board that enhances your backyard game experience.
Remember to double-check each step for accuracy and safety.
Enhancing Your Backyard Game Experience
Transform your cornhole board into a unique centerpiece for family fun and competitive play.
With creative customizations, you can elevate your game experience while maintaining the board’s durability and safety.
Creative Customizations and Decor Ideas
Add a personal touch to your board with vibrant paint designs or personalized logos. These enhancements not only beautify your board but also make it stand out at gatherings.
Consider adding a built-in scoreboard or bag holders for convenience and style.
| Customization | Description |
|---|---|
| Decorative Paint Designs | Add stripes, patterns, or team colors for a personalized look. |
| Personalized Logos | Incorporate your name, initials, or favorite team’s emblem. |
| Built-in Scoreboard | Keep track of scores with an integrated or attachable scoreboard. |
| Bag Holders | Attach holders to the side for easy access during games. |
Involving family members in the decoration process can make the project even more enjoyable. Small design enhancements, like adding LED lights for nighttime play or weather-resistant finishes, can significantly improve gameplay and durability.
“Customization is where form meets function. It enhances the board’s appeal while maintaining its usability.” — Jane Doe, Game Design Expert
Remember, customization should never compromise the board’s structural integrity. With a little creativity, your cornhole board can become a one-of-a-kind addition to your backyard, perfect for both casual fun and competitive play.
Conclusion
Building your own cornhole board is a rewarding project that combines creativity with practical skills.
By following the detailed steps and expert tips outlined in this guide, you’ve gained the knowledge to create a durable and professional-looking game board that will provide years of entertainment for you and your family.
Quality materials and precise measurements are the foundation of a successful cornhole board. From the 2×4 frame to the 1/2-inch plywood surface, every piece plays a role in ensuring the board’s stability and gameplay.
Remember, the hole must be exactly 6 inches in diameter and positioned 9 inches from the top edge, 12 inches from each side, to meet official standards.
Safety and attention to detail are crucial throughout the process. Always wear safety glasses, keep your workspace organized, and double-check your measurements.
Troubleshooting tips, such as rechecking alignments or tightening joints, will help you address any issues that arise.
A smooth, durable finish, achieved through proper sanding and sealing, will protect your board and enhance its appearance.
This project is more than just building a game board—it’s a hands-on learning experience that the whole family can enjoy.
With the ability to customize your design, from vibrant paint designs to functional add-ons like scoreboards or bag holders, your cornhole board can truly reflect your personality.
Whether you’re a seasoned woodworker or a beginner, the sense of accomplishment you’ll feel when your project is complete is invaluable.
Now that you’ve got the tools, knowledge, and confidence, it’s time to get started. Share your finished project with friends and family, and don’t hesitate to show off your creativity.
With proper care and maintenance, your cornhole board will become a beloved centerpiece for backyard gatherings and competitive games alike. Happy building!
Read Also: DIY Cat Tree, DIY Barbie, DIY Anime, DIY Pirate Costume


