What if you could create a weather-resistant storage solution for your garden tools without emptying your wallet? DIY Tool Shed to the rescue.
Many assume quality outdoor structures require professional help or expensive materials. I’m here to prove otherwise.
Over the years, I’ve refined methods to construct durable backyard buildings using reclaimed wood and smart planning.
This guide breaks down how to build a functional space from foundation to roof while staying under $300.
You’ll learn to level cinderblocks for stability, frame walls efficiently, and install a gable design that withstands harsh weather.
We’ll start with selecting lumber and creating a materials list tailored to your yard’s size.
Proper squaring techniques using a framing square ensure straight walls and even door placement.
The step-by-step process includes cutting siding, securing floor joists, and adding windows for natural light.
Affordable doesn’t mean flimsy. By sourcing discounted supplies and following precise measurements, you’ll create a structure that lasts years.
Let’s transform that cluttered corner of your property into organized storage—without compromising on quality.
Key Takeaways
- Construct a durable outdoor storage space for under $300 using reclaimed materials.
- Master foundation leveling with cinderblocks for long-term stability.
- Follow detailed plans for walls, roof framing, and door installation.
- Optimize lumber usage to reduce waste and costs.
- Implement professional squaring techniques for perfect alignment.
- Customize the design to match your yard’s dimensions and needs.
Introduction & Project Overview.
Imagine transforming unused yard space into organized storage while keeping costs under $300.
This project focuses on constructing a durable structure that protects your equipment from weather damage.
Let’s explore why building your own solution beats store-bought options.
Why Build Instead of Buy?
Labor costs account for 40-60% of pre-built shed prices. By handling the work yourself, you’ll save hundreds while gaining full design control.
I’ve used methods from Family Handyman’s classic plans and Ana White’s space-efficient designs to create adaptable blueprints.
Three key advantages make this approach worthwhile:
- Custom sizing to match your exact yard dimensions
- Smart material use with optional reclaimed lumber
- Increased property value through quality craftsmanship
What You’ll Achieve
This guide walks through every phase from permits to paint. Most municipalities don’t require approvals for structures under 120 sq. ft without plumbing.
Always check local codes first—I learned this when a neighbor’s project got delayed over permit issues.
| Feature | DIY Build | Pre-Built |
|---|---|---|
| Cost | $200-$300 | $800+ |
| Customization | Full control | Limited options |
| Assembly Time | 2 weekends | 1 day |
| Material Quality | Hand-selected | Mass-produced |
You’ll master essential skills like squaring walls and installing metal roofing—techniques that transfer to other home projects.
The satisfaction of creating functional storage while staying budget-conscious makes every hammer swing worthwhile.
Planning Your Shed Design and Layout
Effective planning transforms your outdoor storage project from overwhelming to achievable.
Let’s explore how to create a space that fits your needs while avoiding common pitfalls.
Understanding Size, Space, and Permitting Requirements.
Start by measuring your yard with a construction framing square. Mark the proposed area’s length and width, leaving 3 feet of clearance on all sides for maintenance.
Most communities allow structures under 120 square feet without permits, but always verify local codes—I once saw a homeowner redo their entire foundation due to overlooked regulations.
Consider your storage needs realistically. Will you store seasonal decorations or bulky garden equipment?
A 6×8-foot space typically holds 20+ tools while leaving room to maneuver.
Use graph paper to sketch different layouts, ensuring doors swing freely and windows align with your garden’s sightlines.
Selecting the Right Design for Your Yard
Match your structure’s style to your home’s architecture. A gable roof suits traditional houses, while lean-to designs work well in compact spaces.
Position doors opposite windows to create cross-ventilation—this simple trick prevents musty odors and reduces moisture damage.
When adapting free plans, focus on three elements:
- Roof pitch: Steeper angles shed snow better in northern climates.
- Wall height: Taller walls accommodate shelving but increase material costs.
- Foundation type: Gravel bases work for temporary structures, while concrete slabs offer permanence.
Remember: Your storage solution should grow with your needs. Leave space for future expansions, like adding hooks or overhead racks.
With thoughtful planning, you’ll create a functional space that enhances your property’s value and appearance.
Foundation and Floor Framing Techniques.
A stable base determines whether your structure lasts a season or a decade.
I’ve seen projects fail when builders rushed this phase—don’t let impatience compromise your work.
Precision here prevents headaches during wall and roof installation.

Leveling and Squaring the Floor for Durability.
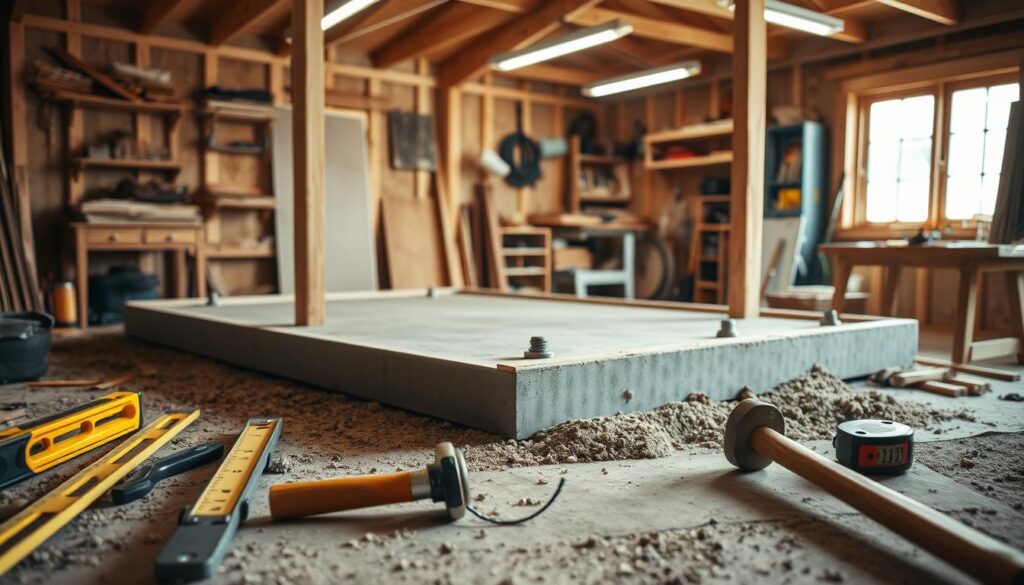
Start by placing cinderblocks at each corner. Use a 4-foot level to check for evenness, adding gravel beneath blocks as needed.
This measured approach creates a flat surface that resists shifting. Remember: 1/8-inch gaps compound into major alignment issues over time.
Square your floor frame using the 3-4-5 triangle method:
- Measure 3 feet along one side
- Mark 4 feet on the adjacent side
- Adjust until diagonal measures exactly 5 feet
Add 2×4 cross members every 16 inches between floor joists. This reinforcement prevents sagging under heavy garden tools or seasonal storage items.
Materials List and Tool Recommendations.
Source these essentials for a 6×8-foot base:
- 12 cinderblocks ($1.50 each)
- 8 pressure-treated 2×6 boards ($4.80 per 8-foot length)
- 1/2-inch OSB panels ($15 per 4×8 sheet)
Essential tools include:
- Framing square ($12)
- Impact driver ($60)
- Chalk line ($8)
“Measure twice, cut once applies triple for foundations. Your walls and roof depend on this accuracy.”
Check lumber yards for discounted “cull” wood—slightly warped boards work perfectly for hidden structural elements.
Pair smart sourcing with meticulous measuring, and you’ll build a space that withstands years of use.
DIY Tool Shed: Wall Framing and Structural Support
Proper wall construction turns your storage space into a reliable shelter. Let’s explore how strategic adjustments enhance both usability and curb appeal.
The right height and reinforcement methods make all the difference in creating a structure that lasts.
Tailoring Wall Dimensions to Your Needs.
Standard 10-foot walls often overpower small yards. Reducing height to 8 feet creates better proportions while maintaining ample storage capacity.
I’ve found this adjustment allows easier roof installation and improves airflow—critical for protecting garden equipment from humidity.
- Improved accessibility: Lower walls simplify hanging shelves or pegboards
- Reduced material costs: Save 15-20% on lumber by optimizing dimensions
- Enhanced aesthetics: Proportional walls complement your home’s architecture.
Building a Resilient Framework.
Quality 2×4 lumber forms the backbone of your walls. Pair these with galvanized L-brackets at each corner for earthquake-resistant joints.
I recommend pre-drilling pilot holes to prevent wood splitting when securing brackets with 3-inch deck screws.
Follow this sequence for flawless assembly:
- Cut studs 1/2-inch shorter than planned height for adjustment room
- Secure bottom plates to floor joists every 16 inches
- Check vertical alignment with a 4-foot level before final fastening
Leave 1/8-inch gaps between wall sections for natural wood expansion. This simple trick prevents warping while maintaining structural integrity.
With precise cuts and proper reinforcement, your walls will support roof loads and seasonal weather changes effortlessly.
Roofing, Siding, and Weatherproofing Essentials
Protecting your outdoor storage from the elements starts with strategic material choices.
I’ve seen projects fail when builders skip vapor barriers or misalign panels – let’s avoid those mistakes together.
Installing Tar Paper and Choosing Metal Roofing.
Begin by rolling out 30-pound tar paper horizontally across your roof deck. Overlap each layer by 2 inches to create a seamless moisture barrier.
This underlayment prevents condensation from warping your structure’s frame.
When selecting metal roofing:
- Choose panels with 1.5-inch tall ribs for optimal water runoff
- Opt for 26-gauge steel – it balances durability with manageable weight
- Install self-drilling screws with neoprene washers every 12 inches along ribs
“Always work from the eaves upward when installing metal roofing. This overlapping technique is non-negotiable for leak prevention.”
Techniques for Proper Siding Installation.
Align your first siding board using a 4-foot level as a guide. Maintain 1/4-inch gaps between boards to accommodate wood expansion. For angled roofs, cut boards at 22.5-degree bevels using a miter saw.
| Material | Cost per Sq.Ft | Lifespan |
|---|---|---|
| Vinyl | $2.50 | 20 years |
| T1-11 Plywood | $1.80 | 15 years |
| Hardie Board | $4.20 | 40 years |
Secure siding with 1-1/4-inch stainless steel nails every 16 inches. Wear cut-resistant gloves when handling metal trim pieces – their edges can be sharper than kitchen knives.
With precise alignment and proper fasteners, your walls will withstand decades of weather exposure.
Constructing an Efficient and Attractive Shed Door.
A well-built entryway combines security with visual harmony. Let’s explore how to craft a door that complements your structure’s design while keeping contents protected.
Proper alignment and material selection make this component both functional and eye-catching.

Designing a Lightweight, Functional Door.
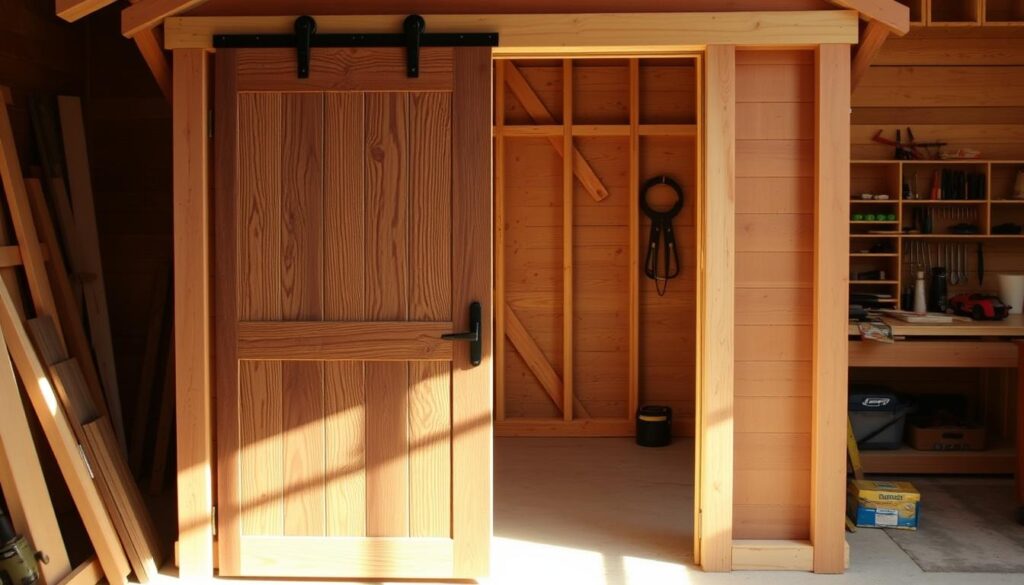
Start by measuring your opening precisely. Cut two vertical 2×4 boards 1/2-inch shorter than the frame height.
Connect them with horizontal pieces spaced 16 inches apart. This grid pattern creates a sturdy base for your OSB panel.
Attach the panel using 1-1/4-inch screws every 8 inches. Leave 1/4-inch gaps around the edges for seasonal expansion.
Cedar siding strips can be added externally for a polished look that matches your walls.
Selecting Hinges and Fasteners for Security.
Choose three 4-inch strap hinges rated for outdoor use. Position the top hinge 7 inches below the door’s upper edge.
Place the middle hinge 12 inches above the bottom edge for balanced weight distribution.
| Hinge Type | Weight Capacity | Installation Tips |
|---|---|---|
| Strap | 50 lbs | Pre-drill screw holes |
| T-Strap | 75 lbs | Use rustproof washers |
| Heavy-Duty | 100 lbs | Reinforce with backing plate |
Secure the door with a sliding bolt latch at mid-height. Apply paraffin wax to hinges annually for smooth operation.
Check alignment by slowly closing the door—it should rest evenly against weatherstripping without sagging.
Cost-Saving Materials and Budget Optimization Tips.
Smart material choices make budget-friendly projects possible without sacrificing quality.
Through trial and error, I’ve discovered creative ways to source supplies while keeping costs under $300.
The secret lies in strategic planning and knowing where to look.
Strategies for Sourcing Affordable and Reclaimed Wood.
Local construction sites often give away leftover lumber—I recently scored 50 cedar fence boards from a neighborhood renovation.
Check Craigslist’s free section daily. One gardener in Ohio built their entire storage structure using reclaimed barn wood found through online listings.
Three proven sourcing methods:
- Visit hardware stores for discounted “cull” lumber (slightly warped boards work for hidden supports)
- Repurpose shipping pallets – sanded smooth, they make excellent wall paneling
- Ask roofing companies for metal offcuts perfect for small gable roof sections
Optimizing Your Materials List to Stay Under Budget.
Start by sketching your shed plan to the nearest foot. A 7×9-foot design uses full 8-foot boards with minimal cutting waste. Compare this table showing potential savings:
| Material | New Cost | Reclaimed Cost |
|---|---|---|
| 2×4 Studs | $3.20 each | $0.75 each |
| OSB Sheathing | $15/sheet | $5/sheet |
| Metal Roofing | $1.50/ft | $0.40/ft |
“Always check leftover bins at lumber yards. My last project’s door frame came entirely from scrap pieces.”
Cut all boards before assembly to minimize errors. Use plywood remnants for shelving, and save sawdust for garden pathways.
With careful planning, you’ll create a functional garden storage space that keeps more money in your wallet.
Finishing Touches for Durability and Style.
The difference between a good structure and a great one lies in the final details.
These last steps transform basic construction into a weather-tight, visually appealing space that protects your equipment for years.
Sealing, Trimming, and Customizing.
Begin by installing fascia boards along roof edges. Cut 1×6 cedar planks to length and secure them with 2-inch exterior screws.
This trim piece directs water away from walls while adding crisp visual lines.
Seal gaps around the door and windows with expanding spray foam. For best results:
- Shake the can vigorously for 30 seconds
- Apply in 1-inch layers to prevent overexpansion
- Trim cured foam with a utility knife
| Sealant Type | Coverage | Cure Time |
|---|---|---|
| Spray Foam | 20 linear ft | 8 hours |
| Silicone Caulk | 30 linear ft | 24 hours |
| Rubber Weatherstrip | 10 linear ft | Instant |
Energy Efficiency Upgrades
Install a dripline edge catch along the roof’s lower edge. This aluminum channel redirects rainwater 18 inches from the foundation.
Pair it with foam board insulation in wall cavities to stabilize interior temperatures.
Three cost-effective upgrades:
- Apply reflective roof coating to reduce summer heat gain
- Add magnetic vent covers for winter insulation
- Install solar-powered LED motion lights
“Quality finishes aren’t just cosmetic—they’re your first defense against weather damage and energy loss.”
Review every joint and seam before applying exterior paint. A meticulous approach here ensures your storage space remains functional and attractive through seasonal changes.
Conclusion.
Building your own outdoor storage solution becomes straightforward when following a detailed shed plan.
Through careful measurement and strategic material use, you’ve learned to create a durable structure from foundation to roof.
The step-by-step process—leveling cinderblocks, framing walls, and installing a gable roof design—ensures lasting functionality without exceeding $300.
Your personalized storage space offers three key advantages: cost efficiency through reclaimed materials, weather resistance from proper sealing techniques, and full customization to match your yard’s layout.
Secure door placement and precise squaring methods prevent common alignment issues, while smart ventilation choices protect your tools from moisture damage.
Revisit the wall framing and roofing sections if you need clarity during construction. Share your adaptations online—many gardeners have improved these plans with creative shelving solutions and solar lighting upgrades.
Now’s the time to transform unused yard space into organized storage. Gather your materials, reference the shed plan details, and start building.
Your future self will thank you every time you reach for a perfectly stored tool.
FAQ
Do I need a permit to build a backyard storage shed?
Can I use pallet wood instead of buying new lumber?
How do I prevent water damage under the floor?
What’s the most cost-effective roofing option?
How do I secure the door without expensive locks?
Can I add windows without compromising security?
What’s your top tip for staying under 0?


